This is one of my favorite soups of all times. It’s so light and full of flavor, and I crave it on early spring days or cool summer evenings. It makes me think of lunches at small cafes at the Bulgarian seaside, or a well earned meal after hiking for two days in northern Minnesota. The beauty of this soup is that the fish is the star, and it is gently poached in the flavorful broth. I absolutely love the texture and the mild flavor of the Whitefish, and I think that it is the perfect fish for this soup. When cooked gentility in the broth, the Whitefish becomes buttery and velvety, and it’s such a wonderful compliment to the rest of the ingredients in the soup.
I absolutely love Julia Child, and the original recipe of this fish soup is from her show “In Julia’s Kitchen With Master Chefs” with Jasper White. The original recipe was made with homemade fish stock. I modified several parts of the original recipe per my taste, and instead of homemade fish stock I used clam juice and water for the base of the soup. I found that calm juice flavors the broth just right, not too fishy or too bland compared to if you just used water. I do have to say that homemade fish stock would be absolutely wonderful for this soup, however I often find myself limited to the fish and the fish parts I can get at my local market, but this would never stop me from finding ways to make this beloved fish chowder even when limited by geographic location or ingredients..
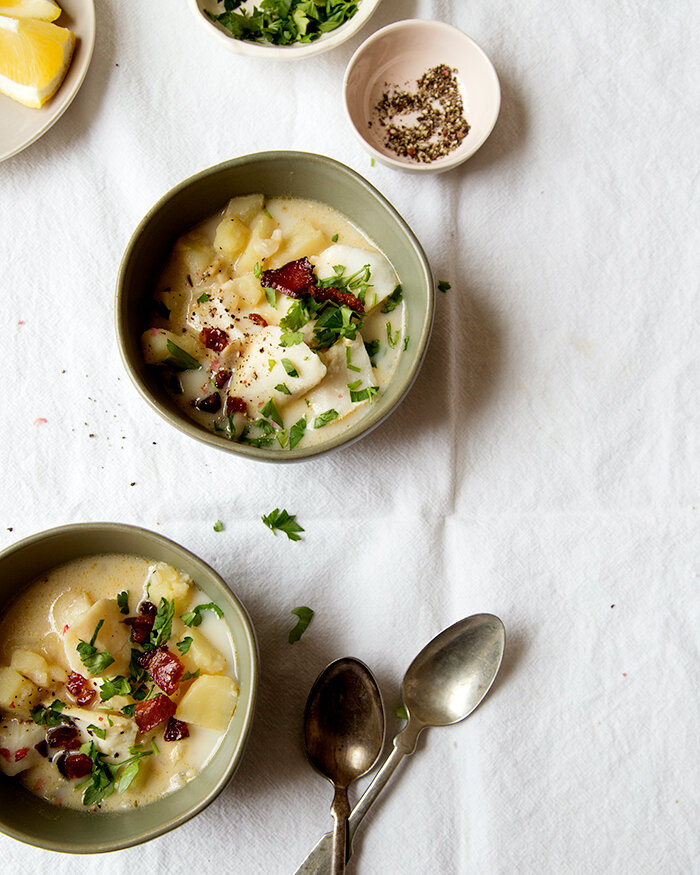
Fish Chowder with Wine and Bacon
Serves 4
Ingredients:
• 5 strips bacon
• 1 large onion, finely chopped
• 2 large russet potatoes, peeled and cut in 1/2-inch cubes (about 3-3.5 cups)
• 1/2 cup white wine (Sauvignon Blanc or Pinot Grgio)
• 1 (8oz) bottle of clam juice
• 3 cups of water
• 1 teaspoon salt
• 1 teaspoon chopped fresh thyme
• 2-3 bay leaves
• 1.5 pounds Whitefish (Pollock, Haddock, Sea Bass, or another white type fish works well too) skin removed
• 1/2 cup heavy cream
• zest of one lemon
• 1 tablespoon fresh lemon juice
• 1/2 cup fresh parsley
• Salt
• Pepper
• Olive Oil
Directions:
Chop the bacon in small pieces (about 1/4-inch). Heat 1tbs olive oil in a Dutch oven or a large pot, add the bacon and cook in until crispy by stirring from time to time so it doesn’t burn. Remove the cooked bacon with a slotted spoon, place on a paper towel-lined plate and set aside for later. Add the onion to your cooking pot with the leftover oil and bacon fat, and cook until soft and translucent, about 5 minutes. Add potatoes and the wine, stir and cook for additional 1 minute to allow the alcohol to escape. Add the clam juice, 3 cups of water, bay leaf, thyme, 1 teaspoon salt and bring to a boil. Lower the heat and simmer on low for about 20-30 minutes, or until the potatoes are soft.
When potatoes are cooked, turn the heat off and remove the bay leaves. Cut the fish into large chunks (about 4-5 inches), do not worry the fish will break into smaller pieces when stirred around in the pot when cooked. The large chunks will prevent the fish from turning into a mush. Add the fish gently into the soup. Make sure the fish is nestled well and covered with liquid. Let it sit with heat off and undisturbed for 30 minutes. The hot liquid will gently cook the fish into a buttery, soft texture.
After 30 minutes add the cream, lemon zest and lemon juice, and gently stir the pot. Taste and add more salt, pepper and lemon juice if needed.
Ladle the soup into serving bowls, top with freshly chopped parsley and the reserved cooked bacon bits. Enjoy!