This spring has been extra long and beautiful. The trees have slowly turned green, the tulips have stayed with us forever and the lilacs have been showering us with their sweet perfume for weeks. And it’s all because of the cool air and the spring rain. If you could be in Minnesota right now, you will be mesmerized by the color of the grass – so bright and green, almost unreal. As for every tree, bush and flower, everything has taken their time to bloom, not wanting, quite yet, to be summer again.
I have been taking my sweet time during this spring too, and in general it is expressed in my appreciation of the many flowers that have been blooming all over my neighborhood. If you live in the Lowery Hill area and if you have been suspiciously missing (especially in the morning) lilies of the valleys, lilacs, tiny green hydrangeas and some white bush flowers (whose name I don’t know) from your side walk, it might have been me. I like taking small fragrant bouquets from my late night walks to my home and place them by my bedside so I can be woken up by their aroma.
During those everlasting spring days I love taking long walks after work and at night, when everything is quiet and I can be guided only by the lovely fragrance coming from each yard. On the weekends I love the quiet mornings or meeting friends for coffee or lunch. And my weekend two weeks ago went just like that, and as Anna and I grabbed some ginger limeade on our way out from the coffee shop, my mind blown by the fresh explosion in my mouth. My eyes squinted from pleasure and I couldn’t stop sipping this spicy, extraordinary deliciousness. The flavor stayed with me all day, and I had decided that I will make some for myself (in grande amounts) to be enjoyed during my late night flower walks.
The ginger limeade from Moose and Sadie’s was extra gingery and limy, and I liked that, but my first batch turned out to be super sweet and with not much flavor. So I boosted the ginger and lime, lowered the sugar and after a few attempts and several trips to the store for limes, I made it perfect. To make it even fresher and richer in flavor, I added a bit of honey and a handful of mint. Now my friends, if you are fast enough, I still have some left in the refrigerator and I am more than happy to share it with you, so come by.
xoxo


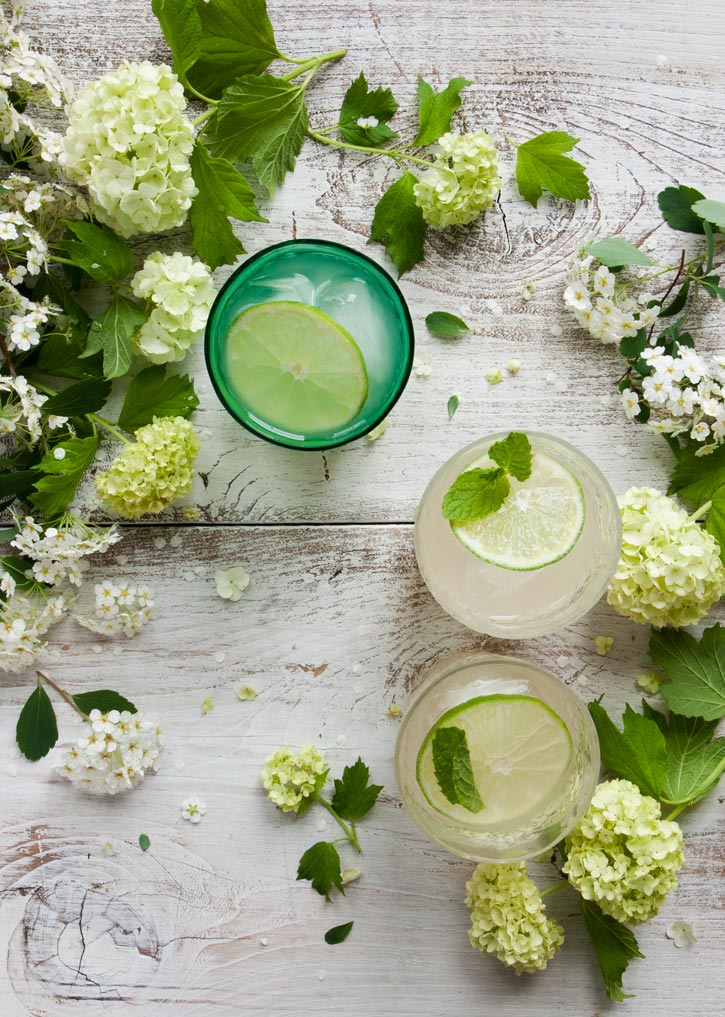
Minty Ginger Limeade
Serves 4-6
Ingredients:
• 2 (10 inch long / 25 cm) ginger roots
• 4 cups (800 ml) water
• 1/2 cup (100 gr) granulated sugar (or more if you like it sweeter)
• 1 tbsp honey
• 1 cup (200 ml) freshly squeezed lime juice (about 8 limes)
• 1/2 cup (or handful) fresh mint leaves
Directions:
Peel the ginger roots and slice them thinly. Place the ginger and 2 cups of water in a medium saucepan, bring to boil, lower the heat and simmer for 30 minutes. Remove the ginger pieces and stir in the sugar and the honey until fully dissolved. Let it cool completely.
Add the mint leaves into the gingery syrup and muddle to bruise the leaves and release the mint oils. Add the lime juice and the remaining water and chill in the refrigerator for at least an hour, or overnight. Remove the mint leaves and pour in a bottle or a pitcher, if enjoyed right away.
Pour the limeade into glasses filled with ice.
Note: the ice will dilute the limeade as it melts, but feel free to add a bit more water if the limeade is too strong for you