Search
  • Journal
  • Recipes
  • About
  • Say Hello
  • Subscribe
Close
Menu
Search
Close
  • Journal
  • Recipes
  • About
  • Say Hello
  • Subscribe
Menu

sprig of thyme

November 24, 2018

Kiopoolu–Smoked Eggplant Dip

by Iglika in Bulgarian recipe


Smoked_Egplant_Dip_Sprig_Of_Thyme_Cover.jpg


Hello my dear blog! Sorry, I haven’t been here with you in a long time. And it’s not that I have forgotten you. Quite the opposite. I have worked on recipes for you, and I have taken tons of photos to make you beautiful, and been with some amazing food-cooking farm-living creatures to write you some good stories. Yet, somehow, sitting down and writing has been slipping away from me. Maybe it was the summer. Maybe it was the lovely people that surrounded me. Or maybe both. But hey, winter is here and I have no more excuses but to sit inside on a chilly day and write and write and write. So here I am.

And now, about today’s recipe:
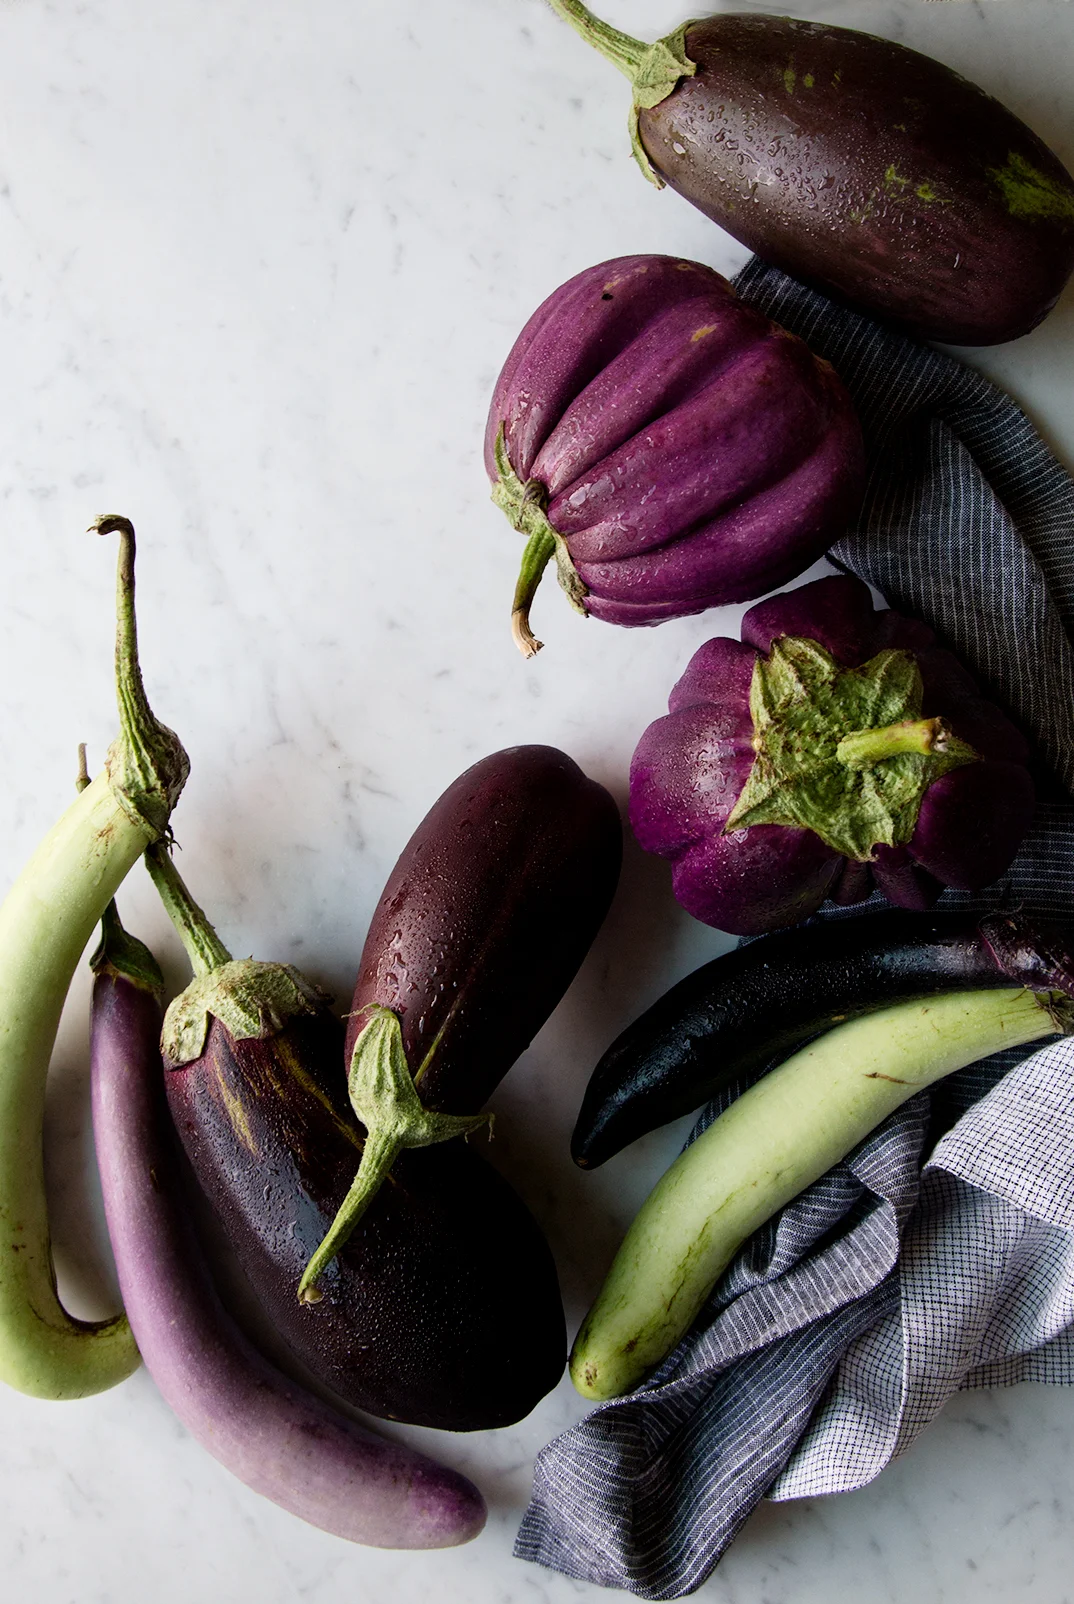
Kiopoolu my dear American friends is the Bulgarian word for eggplant dip or Baba Ganoush. Just as the other well know forms/names of a eggplant dip the eggplant is roasted (or grilled) to soften the flesh, then the flesh is scooped and mixed with garlic, olive oil and some acid, like lemon juice or vinegar, and enjoyed as a side dish or an appetizer. I loved Kiopoolu when I was a kid because my dad always grilled the eggplant on a hot summer August night. Then while still hot, he removed the skin with a knife and mixed the flesh in a huge wooden mortar and pestle with some roasted red peppers, grated fresh tomatoes, garlic, vinegar and lots of parsley. I loved the smooth texture of the eggplant dip and the zesty-freshness of the tomatoes and the vinegar. My memory of these times is that my family always enjoyed the Kiopoolu on that hot summer night when all bunch of dips and salads replaced a cooked, dinner just because it was too hot to eat heavily cooked meal.

My version of Kiopoolu is a mix of the  Kiopoolu of my childhood combined with my experiences enjoying the different ways of eggplants and dips I had over the years as I lived in the United States or traveled to Greece. What I love about the eggplant as a vegetable is that its flesh is mild in flavor and absorbs and serves as a base for so many other flavors as it holds them together. You can go as basic as salt, olive oil, garlic and acid or, go all the way by adding parsley, mint, walnuts, and roasted peppers. In this recipe, I grilled the eggplants whole which hardened their skin and made it easy to scoop away the flesh and it added that slight smoky-summery flavor to the dip. I used lemon juice and added fresh grated tomatoes for a balanced and complex acidity. I also used both mint and parsley for freshness and mixed everything with fine ground walnuts. 


Hope you like it ❤

xoxo


IMG_8314.jpg
IMG_8351.jpg
IMG_8387_V2.jpg

Kiopoolu – Smoked Eggplant Dip

Serves 4-6 as an appetizer


Ingredients

• 2 medium size eggplants
• 2 Roma tomatoes, grated*
• 1/4 cup whole fat Greek or Icelandic yogurt
• 1 large garlic clove, finely minced 
• 3 tbsp olive oil + more for serving
• 1/3 cup raw or toasted walnuts, finely pulsed in a food processor 
• 2 tbsp finely chopped mint + few leaves for garnish
• 2 tbsp finely chopped parsley + few leaves for garnish
• 1/2 lemon, juiced (about 3 tbsp)
• Salt + Pepper 
• 1/2 tsp Sumac (optional) 


* To grate tomatoes: slice them in half and grate (flesh side against the grater) on the largest holes of a grater over a medium bowl until all that’s left is the flattened tomato skin and stem. Discard skin and stem. 


Directions

  1. Prepare a charcoal grill for medium heat (coals should be covered with ash and glowing red with no black remaining.) Place eggplants 2 inches from heat source. Allow skins to blister and char, turning with tongs until entire surface is blackened and eggplants are completely soft, about 10 to 12 minutes. Set aside on a large plate until cool enough to handle and to allow some of the juices to run out.

  2. Slice the eggplants lengthwise and scoop the flesh from the skin into a the bowl of a food processor (it’s okay if bits of charred skin get in there too). Discard burned skins. 

  3. Place the remaining ingredients except the sumac (if using) in the food processor and gently pulse until all ingredients are incorporated but still slightly chunky (Do not over blend or you will end up with a baby-food-like puree.) Taste and add more salt, lemon juice, herbs or olive oil per your liking.

  4. To serve, drizzle the dip with more oil and top with mint and parsley leaves and sumac (if using.)

Dip can be made up to 2 days ahead. Cover and keep chill.

Print Recipe
Comment

TAGS: appetizer, side dish, Vegetarian, eggplant, summer


August 13, 2017

Strawberry Kompot

by Iglika in Bulgarian recipe


Bulgarians call Kompot “summer in a jar”. It’s like capturing the sun and the sweetness of the fruit at that one right moment when all the flavors are alive and make you feel like you never tasted a fruit like that before. 

Kompot, just as Lutenitsa, was my favorite preserved foods when I was a child. My mom would come home with bags of fruit from the farmers market, put her favorite music on, close the kitchen door and do her magic. Each time I would walk by the kitchen I could smell the sweet strawberry fragrance filling the air and just as a dog follows the trace of a scent, I would follow the sweet, fruity smell, open the kitchen door and wonder around the kitchen while stealing fresh strawberries or dipping my fingers in the sweet Kompot water or the warm jam. When the Kompots were done she would store them in the cellar for the winter when no fresh fruits and vegetables were available. But I could never wait all the way to the winter to have a glass of Kompot. And in moments of impatience I would sit in front of the row of hot jars waiting for them to cool down and inspecting for bulging lids – a proof that the jar didn’t seal properly, which meant we had no other choice but to drink the fresh Kompot.

If you are starting to wonder what Kompot is and what it tastes like, it is a very simple technique of mixing fruit, sugar and water where the wonderful flavor and juices of the fruit get extracted by quickly sterilizing (by boiling) the jar with all the ingredients and then letting it to cool and sit for a day or more, so the fruit flavor deepens. The process is very gentle due to the fact that the fruit is enclosed in a jar which keeps the gentle fruit from rapid boiling or falling apart. The final result is a wonderful, flavorful drink that captures the best flavor and aroma of the fruit and is very refreshing when poured over ice. Any fruit packed with flavor can be turned into Kompot but my personal favorites are strawberry, raspberry, pear and quince Kompot. 

Kompot has one secret just as anything beautiful and real on this earth, the fruit has to be grown with love under the warm sun, picked just at the right moment when ripe, full of flavor and sweetness and turned into a Kompot the same day the fruit is harvested so all the flavors, juices and goodness are preserved.

As summer goes by and early fall approaches many fruits come at their best. And if you are fortunate as I am, there might be a fruit picking farm nearby where you live. Grab your friends and spend a weekend trip picking delicious fresh fruit. Crispy apples, pears, cherries, or peaches add some sugar, pop them in a jar and make a Kompot. This might become your new favorite drink!

xoxo

Strawberry Kompot Recipe
 

Strawberry Kompot Recipe


Ingredients:
• Granulated sugar
• Fruit
• Water
• Orange or Lemon rind (optional)


Equipment:
• Jars with brand new lids (screw or twist-off lids)
• Large pot (tall enough to allow at least 1-inch above the jar lids)


Sugar Proportions:
• 1 tbsp of sugar for every 6oz. (200ml) jar


Directions:

  1. Fill the jars halfway through with fruit. Add the sugar (see Sugar Proportions above)and lemon or orange rind, if using. Fill the jars with cold water by leaving 3/4-inch (2 cm) headspace (the easiest way to figure the headspace is by leaving the jar’s neck clear of liquid). Wipe the lip of the jars with clean towel to remove any sugar. Close really tight with the lids

  2. Place the jars in the pot with the lid side up. Fill the pot with water making sure that the water is covering at least 1/2-inch above the jars. Bring to gentle boil and sterilize for 5 minutes. Start timing when the water starts to boil. 

  3. To remove the jars from the hot water carefully pour some of the hot water. Using a kitchen mitten or a layered towel, grab each jar, place them upside down on a wire rack or a towel and let them cool completely. Turn the jars lid side up and let them stand at room temperature for at least 1 day before serving.

Store Kompot jars in a cool place. They will be good for up to 1 year after making.

To enjoy Kompot, fill a glass with ice and pur some of the Kopmot liquid leaving off the fruit (some people like to eat the fruit). Store opened Kompot jars in the refrigerator.

Happy canning!

Print Recipe
Comment

TAGS: drink, kompot, strawberries, summer


November 11, 2014

Lutenitsa–Pepper Tomato Spread

by Iglika in Bulgarian recipe, from scratch


This story begins with a gigantic bucket of red peppers on a sunny fall day. The bucket was supposed to weigh 11 lbs (as my mom advised me), but in fact the bag ended up being 25 lbs. You know how the farmers market has these big buckets of bumper crop at the end of the season, the produce is usually at a good price and is perfect for canning and winter storing. That is what I ended up buying for $13 and I didn’t realize the weight of the bucket until I got home. Oh, well...what is a girl to do in this situation...I tried staring at the pile of peppers hoping that my stare will reduce the amount in half, but it didn’t work. So, as the Americans say, “the more, the merrier”.

The story then continues with me trying to start the coal grill, which for some reason decided not to cooperate with me on the day I had to roast 25 lbs of peppers. After 30 minute struggle and a step by step phone tutorial from a friend, I managed to get the stubborn grill going. After this success I put my plan in order and estimated that I will be done grilling all the peppers in about an hour. The grill had other plans though and it got its revenge on me by making the process 4.5 hours long. Phew! 

As you are reading you are probably wondering why on earth I am doing all this work. Well, the story goes back many, many years ago to the time when I was a young girl back with my family in my hometown of Sofia. It was another sunny fall day and my mom, sister and I would go on several trips to the farmers market and buy (what back then looked to me like) at least 200 lbs of peppers. Of course we didn’t buy that many peppers, but the bags seemed sooooooo heavy and the trips soooooo long.  Then the whole family will be organized into a mini factory line – roasting, cleaning, grinding, chopping, mixing, jar filling and sterilizing. The end product was Lutentitsa. I remember how tired I would be after the intense long process but we had to keep going otherwise the peppers will get spoiled (back in the 80’s we didn’t have freezers in Bulgaria and those European refrigerators were of miniature sizes). The best part of the day, at this point night, was a chilled watermelon that we ate when we were done – at about midnight. I remember the fragrant aroma coming from the heavy watermelon slice with juices running all over my hand and along my arm. I didn’t care, I was about to bite into the crisp juicy flesh and enjoy it with my eyes closed. What a nice prize for all that hard work.

Everyone made Lutenitsa when I was younger. All of my friends will have those family canning days, especially in the fall when the nature’s abundance is so great. But what stuck with me the most was the smell of the roasted peppers. The charred sweet aroma would fill the air and it could be sensed all over the city. Every family, every balcony had a pepper grill (chushkopek) and it would be used with great pride every summer and fall. 

Lutenitsa to Bulgarians, my dear American friends, is what peanut butter is to you. It is spread on breakfast toast and enjoyed as a snack or a party/appetizer bite. 

Back to my story and the present day. I always missed Lutenitsa, not just any Lutenitsa, but my mom’s Lutenitsa. It is the best! It is chunky and sweet (not from sugar but pureed carrots) and with tons of parsley. I liked my mom’s Lutenitsa so much when I was younger that I always wished we would make more...it never seemed enough. And as people say, be careful what you wish for. Life has its own ways of giving us what we want. In my case, it came as a misjudged 25 pounder bucket of peppers.

Spread on the love, my friends, and enjoy Lutenitsa as Bulgarians do, on a piece of crusty bread with some butter, feta or soft goat cheese.


To my mom, with all my love!

Lutenitsa


Equipment:
• 8-10 (16oz) jars with jars with new metal lids
• 1 large pot (at least 7” deep)


Ingredients:
Makes about 8-10 16oz jars


• 10-11 pounds (25-30 peppers) of sweet red peppers
• 6 medium carrots, peeled and sliced in half
• 2 sticks of celery, sliced in four
• 1 cup parsley, chopped
• 18oz (1 medium + 1 small cans) tomato paste
• 1.5 tsp salt
• 3/4 cup olive oil
• 1/2 tblsp balsamic or red wine vinegar (optional)


Directions:

  1. Wash and dry the jars.

  2. Preheat your grill, if using. If you don’t have a grill, you can use the oven broiler instead (for step 3)

  3. Wash and dry the the peppers. Arrange on a rimmed baking sheet (work in batches if needed), leaving at least 1/2 inch space around each pepper. Place peppers under the broiler (alternatively you can use the grill) and roast until their skin blisters and turns black. Check peppers every 3-5 minutes to make sure they are not burning. Turn peppers over when a side is blistered and with dark spots. Roast until all sides of the peppers are blistered and with black spots, 25-40 min depending on your oven type and broiler settings. Remove peppers from the oven and place in a large pot or bowl and cover tightly with a lid. Repeat with the remaining peppers, if any. Let peppers cool completely, the steam in the bowl/pot will loosen their skin. The skins should peel away off of the peppers easily when cooled.

  4. Place carrots and celery in a medium pot, cover them with water and bring to a boil. Lower down to a low-heat and simmer until the carrots and celery are soft, about 10-15 minutes. Drain the water and let the carrots and celery to cool down for 15 minutes.

  5. Meanwhile, peel the pepper skins from the cooled roasted peppers, remove the stem and the seeds. Seeds can be easily removed if the roasted peppers are cut open and the seeds are gently scraped with a spoon or back of a knife. Do not run peppers under water to clean, you’ll lose most of the roasted flavor that you worked so hard to get.

  6. Place as many peppers as you can fit in your food processor (using an immersion blender works well too). Pulse a few times until peppers are pureed but still a bit chunky. Place the pureed peppers in a large mixing bowl.

  7. Add the boiled carrots, boiled celery and the tomato paste in a food processor, blender (using an immersion blender works well too) and puree until smooth. Place the puree in the large bowl with the peppers. Add the chopped parsley, olive oil, salt and balsamic vinegar. Mix everything until well incorporated. Taste and add more salt, vinegar or olive oil per your liking.

  8. Take a jar, make sure it is dry, and fill it with Lutenitsa using a spoon. Make sure the jar is not filled all the way to the top, fill only to the point where the jar neck starts. Wipe clean the jar top, otherwise it might not create a solid vacuum with the lid. Close the jar with a lid and make sure the lid is tight. Repeat the process with the remaining jars until no Lutenitsa is left.

  9. Working in batches if necessary, place the Lutenitsa jars in a large pot, standing and lid side up. Leave a little room between the jars, just enough so they are not touching. Make sure that the pot is deep enough; you need at least 2 inches of space above the top of the jars. Fit as many jars as you can but make sure the jars are not touching each other. Fill the pot with water so that it covers the jar lids by at least an inch.Bring the pot to a boil, lower to med-heat and simmer bubbling for 10 minutes (start timing after the water starts boiling). During the 10 minutes of canning make sure the water is bubbling but not super aggressive and splashing. Check the jars from time to time to make sure no jar is leaking.

  10. After the 10 minutes of canning, pour the water from the pot carefully, it will be really hot! If some water is still left at the bottom of the pot that is ok, the most important thing is to be careful when pouring the hot water from a pot filled with jars. Let jars sit for 10 min to cool off slightly.  Using a jar lifter or a thick kitchen towel, carefully remove jars from the pot and place them on a kitchen towel. Repeat the sterilizing process with the remaining jars, if any.

  11. Cool the jars completely and store in a cool place. Lutenitsa can be stored for up to 1 year. Refrigerate opened Lutenitsa jars, and consume within 10 days of opening.

print recipe
18 Comments

TAGS: appetizer, peppers, tomatoes, Лютеница, Домашна лютеница, summer


  • Newer
  • Older

Powered by Squarespace 6