Search
  • Journal
  • Recipes
  • About
  • Say Hello
  • Subscribe
Close
Menu
Search
Close
  • Journal
  • Recipes
  • About
  • Say Hello
  • Subscribe
Menu

sprig of thyme

August 5, 2014

Elderflower lemonade

by Iglika in Bulgarian recipe


The small sunny apartment gradually became dark as the cool summer night stepped in. A big brown grocery bag was waiting by the door for the girl to come and take it to their next late night adventure. This time the brown bag was filled with a pair of scissors and a box of cookies. The girl looked at the clock – it was time. She got up, put her sandals on and grabbed the bag. They walked for about 20 minutes until they reached the neighbor’s house the girl had spotted earlier that evening. The location of the house was perfect – quiet, far away from the never sleeping apartment windows and most importantly, it had a big elderflower tree in the yard with lush, white, fragrant flowers that were filling the air with sweet honeydew aroma. 

The girl looked up to see if the house was sleeping. One of the windows still had the light on although it was almost 2am. The girl hesitated for a minute but then decided to continue as she planned. She reached for the scissors and begun clipping the elderflower bouquets from the tree and placing them in the brown bag. She worked quickly as her eyes kept glancing at the house window with the light – she didn’t want to be caught. Twenty minutes later the brown bag was filled with sweet aroma and more than 30 heads of elderflowers. She thought is was enough.

She reached for the box of cookies she had taken out of the bag earlier and walked to the front door of the house. She kneeled down, placed the box of cookies on the door step and slowly disappeared into the dark city streets. As she walked back to her apartment, she was happy and thankful for the chance and the people who owned the elderflower tree. It was very unlikely for this time of the season to find still fresh elderflower flowers and she did.

My grandmother used to make elderflower syrup. It was one of the most cherished moments of my early childhood as we spent our summers in the mountains. Sometimes, in the early summer days, she would go for a walk and come back with an apron full of elderflowers. We would watch her as she shook the flowers from the bugs and placed them in a pot full with water and sugar. A day later the syrup will be ready and my sister and I would wait impatiently as our glasses were getting filled with the sweet treat. We would drink the glasses as quickly as possible and we would beg for more.

 ----------

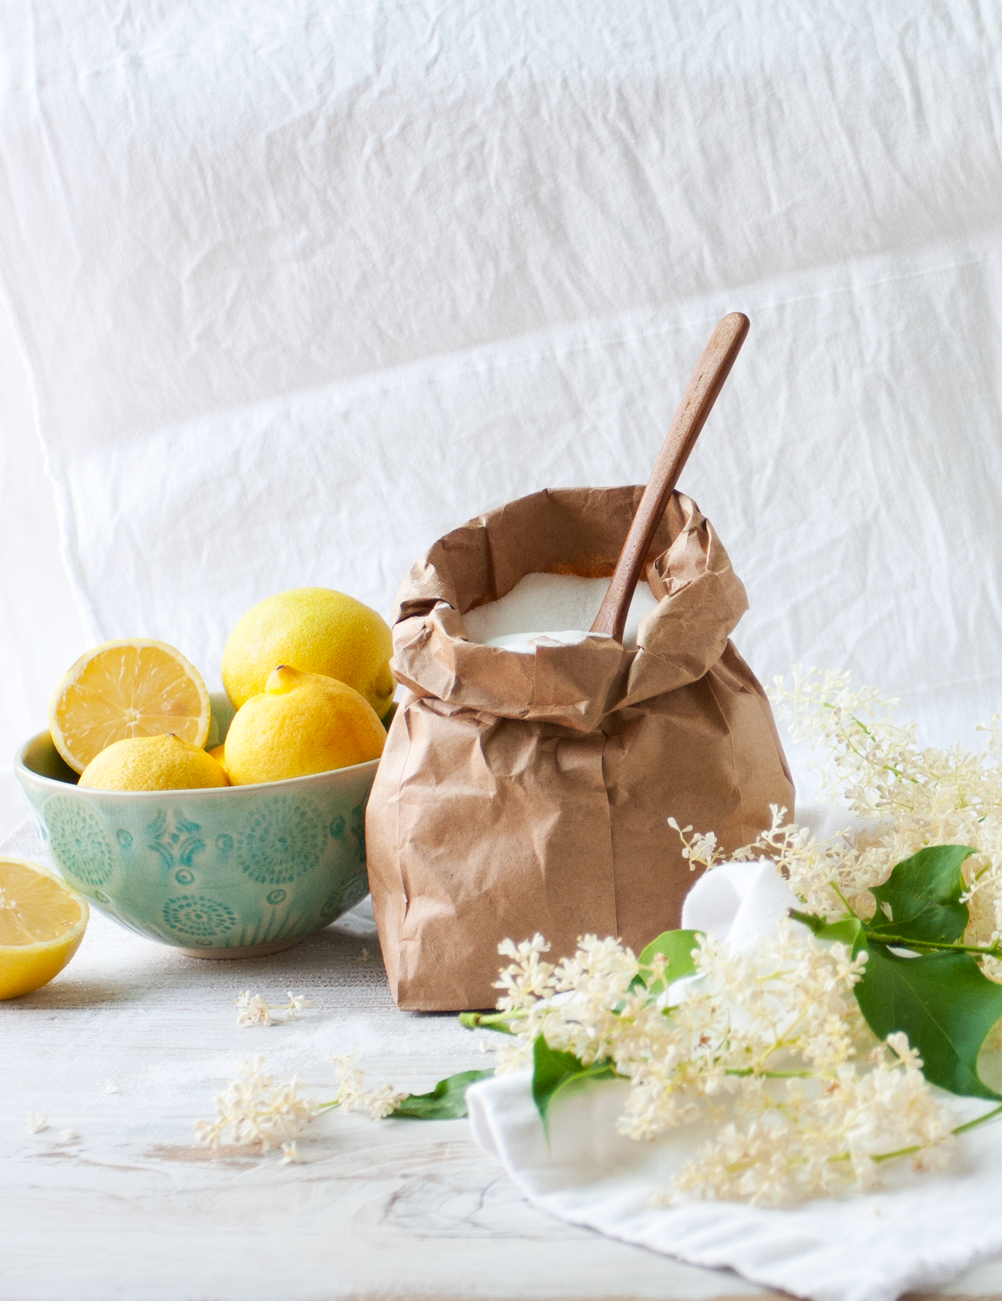
Elderflower syrup is very easy to make. All you need is fresh elderflowers – they should be white, not yellow and when shaken the individual tiny flowers should stay on the stem. Depending on where you live in the world, elderflower bushes/trees bloom in June (this year the winter was so cold in Minnesota and I picked mine in late June). Then the flowers are soaked in water with sugar and lemons for 24 hours. The elderflower pollen is what makes the syrup, washing the flowers before soaking them will remove some of the pollen. That is why it is better to shake the flowers to remove bugs and other particles instead of washing them. When the mixture had steeped long enough, it is strained, heated and bottled and can be preserved for several months. 


Elderflower Lemonade


Elderflower Syrup

Makes 10 cups (2.5L) syrup


Ingredients:
• 30-40 elderflower heads
• 4 lemons, 2 sliced and 2 juiced
• 5 cups (1 kg) granulated sugar
• 10 cups (2.5L) water
• 2 teaspoons citric acid


Directions:

1. Shake the elderflowers to remove any insects or particles. Using scissors cut the flowers off the clusters. Try cutting close to the flowers, leaving as little of the green stems as possible. Drop the flowers into a large pot that has been filled with the water. Add the sugar and the sliced lemons. Stir until most of the sugar is dissolved. Cover and let it stay in the refrigerator for 24 hours. Stir from time to time to completely dissolve the sugar.

2. Squeeze the juice out of the soaked lemons back into the syrup mixture and discard the lemons. Strain the mixture through a cheesecloth-lined strainer. Add the juice of the remaining 2 lemons and the citric acid. Heat the syrup over medium-high heat until it starts to simmer. Decant into sterilized bottles*. The syrup will keep in the refrigerator for up to 1 year.

*Sterilize bottles by running them on the hottest cycle of your dishwasher and then put them on a foil lined baking tray in the oven at 300F for 20 minutes. Make sure bottles are not touching each other. Swing tops should be removed beforehand and kept soaked in hot water while the bottles are being sterilized. If you don’t have a dishwasher, wash the bottles with hot soapy water. Fill them with hot water, let them stand for 10 minutes, empty them and repeat this process 3 times before placing the bottles in the oven.


Elderflower Lemonade

Makes 7-8 glasses


Ingredients:
• 1 lemon, sliced
• 3 tablespoons granulated sugar
• 1/2 cup (packed) fresh mint leaves
• 2 cups fresh lemon juice (about 8-12 lemons depending on size and juiciness) (roll on counter to make them juicier)
• 1 1/2 cup elderflower syrup (see recipe above), this amount will vary if using store-bought elderflower syrup (you can buy it from IKEA, for example)
• 6 cups cold water


Directions:

1. Using a cocktail pestle or a potato masher, mash the lemon slices, sugar and mint (this will release the oils form the lemon skin and the mint which contain lots of flavor). 

2. Add the elderflower syrup, the lemon juce and the cold water. Stir and let it sit in the refrigerator for 30-45 minutes to further enhance the flavors. 

3. Strain the lemonade and remove the lemon slices and the mint leaves. Store the lemonade for up to 2 days.

Pour over ice and enjoy!

print recipe
2 Comments

TAGS: elderflower, lemonade, drink, Лимонада със сироп от бъз, сироп от бъз, spring


May 3, 2014

Italian brioches

by Iglika in Bulgarian recipe


So this year I completely forgot about Easter, maybe because it was so cold for so long that I somehow imagined that Easter would be in July, when the snow is finally gone. But no, it was in April, and I realized that a few days before the holiday, so I was completely unprepared.

For years my Easter bread has been a disaster so I really wanted to improve the recipe this year. But since it was too late to test, improve and post the recipe on time for Easter, so I decided to just go for Italian brioches.

For those of you who don’t know, brioches are sweet pastry treats which in Italy are as widely spread as the croissants in France. They are made of sweet dough, which is also used to make Easter bread in eastern Europe and Greece. In Italy, brioches are enjoyed all year around and they are sold in cafes and pastry shops. Italians have them with their morning espresso and the brioche filling can be anything from almond paste to vanilla cream and jam. I thought, since I am doing it the Italian way, why not give the Italians the whole tribute and make my brioches with Nutella, the very Italian chocolaty spread, mixed with crushed roasted hazelnuts.

For those of you that know how to make sweet dough or Easter bread, I have used egg yolks only in this recipe. I have found that the higher fat content of the egg yolks keeps the dough from drying out, resulting in softer brioches for several days. 

Making the sweet dough can be a half day process since the dough needs to rise twice. I have shortened the process by making the dough in the evening, letting it rise once, leaving it overnight in the refrigerator to rise the second time, and baking in the morning. Easy peasy and less stressful!


Sprig_of_thyme_Easter_Brioches_Step1.jpg
Sprig_of_thyme_Easter_Brioches_Step2.jpg

Italian brioches

Ingredients:

Makes 16 brioches

• 3 tablespoons of lukewarm water
• 1 1/2 teaspoons active dry yeast
• 1/3 cup granulated sugar
• 3 egg yolks (at room temperature)
• 1 egg white (for egg wash) (at room temperature)
• 2 3/4 cups unbleached all-purpose flour
• 1 teaspoon salt
• 1 lemon, zested
• 1 orange, zested
• 1 Vanilla bean (or 1 teaspoon vanilla extract)
• 2/3 cup whole milk
• 1/4 cup oil (vegetable, canola or sunflower)
• 1/2 cup Nutella
• 1/3 cup whole hazelnuts, skins removed, roasted and coarsely chopped


Directions:

1. Place the warm water (a bit warmer than lukewarm, but not too hot to kill the yeast), in a medium bowl and mix in 1 teaspoon of sugar, sprinkle the yeast over the mixture. Let sit until yeast foams and almost doubles its size, about 10-15 minutes.

2. Combine the flour, salt and sugar in a large mixing bowl and mix with a whisk. Run a sharp knife over the vanilla bean, split it like butterfly and scrape out the seeds with the back of the knife. Add the vanilla beans to a small sauce pan and pour the milk. Heat the milk and vanilla mixture over low heat, mix regularly until the milk is lukewarm or a little bit warmer, about 1 minute. 

Hand method:
3. Make a well in the center on the flour mixture and add the milk, yeast mixture, egg yolks, lemon and orange zest. Mix with your hand starting from the center of the well and working your way out by adding flour from the sides of the bowl. While mixing, slowly incorporate the oil by adding a small amount each time. Form a soft bowl and transfer it to a lightly floured surface and knead for about 10 minutes by adding small amounts of flour if necessary. The dough should be soft and it should bounce back when pressed with your finger.

Stand mixer method:
3. Place the flour mixture, milk mixture, yeast, egg yolks, lemon and orange zest in the bowl of the mixer. Slowly add the oil, one teaspoon at the time, incorporating well between additions. Mix on medium speed for 1 minute and then knead on medium-high speed for 5 minutes. The dough should be soft and it should bounce back when pressed with your finger.

4. Transfer the formed ball into a large lightly oiled mixing bowl. Brush some oil on the top of the dough, cover the bowl with plastic wrap and let it rise in a warm draft-free place until it doubles its original volume, about 1-2 hours depending on the temperature at your home.

5. While the dough is rising, mix the Nutella with the crushed roasted hazelnuts. Leave at a room temperature until ready to use.

6. Punch the risen dough with your hand to remove some of the air, transfer it to a flat lightly floured surface, cut in half and form a ball with each half. Take one of the balls, sprinkle some more flour onto the surface and over the ball, and roll it with a rolling pin until the circle becomes 13” in diameter. Using a sharp knife cut the dough into 8 equal triangles, using sharp strokes without dragging the knife through the dough.

7. Take one of the triangles, stretch it a bit more, about 5x7.5”, place a teaspoon of the Nutella mixture in the center of the wide end of the triangle. Roll the triangle to form a brioche, starting from the wide end of the triangle and moving to the thin end. Do not squeeze or tighten the roll too much while rolling. Repeat the process with the rest of the triangles and the second ball of dough. 

8. Divide the brioches between two 14x16” baking trays lined with parchment paper. Cover well with plastic wrap. The wrap should not be too loose or too tight (the brioches will rise and they need some room but also they shouldn’t form a skin). If baking the same day, let the brioches rise until they double its size, about 1 hour. If baking the next day, place the trays in the refrigerator and take them out 30-40 minutes prior to baking.

9. Preheat the oven to 350˚F.

10. Make an egg wash by mixing the preserved egg white with 1 tablespoon of water. Brush each brioche with the egg white sprinkle it with raw crushed hazelnuts if desired.

11. Place one of the trays in the oven and bake for about 20-25 minutes (depending on your oven) while rotating the tray halfway through the baking. Repeat with the other tray (if you have a fancy schmancy oven you can bake them at once).

Let the brioches cool for at least 20 minutes before enjoying.

print recipe
1 Comment

TAGS: brioches, breakfast, Easter, sweets, Козуначени кифлички с Нутела, spring


April 18, 2014

Homemade yogurt

by Iglika in Bulgarian recipe, from scratch


If there is any food I continue to cherish and love that came from my homeland, it is yogurt. Not any yogurt, but Bulgarian yogurt. A friend of my sister told her once “You eat yogurt with everything”. And this is true. Bulgarians eat (plain) yogurt for breakfast, lunch and dinner; this includes plain yogurt on its own, as an ingredient or a condiment to savory dishes. We even make a yogurt drink (but I will not torture you with that recipe).

So, what is yogurt? It is nothing more than warm milk and a starter/culture. The two are mixed and kept in a warm place for a few hours (which allows the culture to grow), and when the desired thickness and tartness is reached, it is preserved in the refrigerator. 

Why homemade yogurt? It is fresh and healthy (no additives or sugars), but most importantly, the natural fermentation process minimizes the lactose content in the milk (which makes it easy to digest) and the formed bacteria is very good for your tummy because it creates an environment where the nutritional value of all the foods we eat is increased. Therefore, it helps your digestive system function more efficiently.

For breakfast, I love my homemade yogurt simple; a handful of berries, rolled oats, few sliced almonds and topped with honey. Yum! Yum! Yum!

I have listed 2 methods (2 different culture sources) for making homemade yogurt below. I prefer using whole farm milk (the one that comes in glass bottles).

Method 1:
Using a freeze-dried starter (found in most natural and organic food stores). Those are small packets of freeze-dried yogurt, which make about a quart (1 liter) of homemade yogurt. I prefer using them, because I get thicker, firmer yogurt and more consistent results.

Method 2:
My grandmother’s method, using a small amount of yogurt as a starter. In this method the consistency depends on the quality and the quantity of the starter. The only commercial yogurt that should be used as a starter is the one made with milk (and cream) and bacteria; NO gelatin, sugar, or pectin as an ingredients. Otherwise it will not work. Also, the fresher the starter is, the better.


Ingredients:

Makes a quart (1 liter) of yogurt

• 1 quart (1 liter) whole milk*, at a room temperature
• 1 packet of dry-freeze bacteria 
or
1 teaspoon of fresh plain yogurt (see note about Method 2), at a room temperature


Supplies:

• 2 (16 oz.) glass jars, or a 1-quart glass or a ceramic container (do not use plastic)
• Instant read thermometer (optional)
• Medium size sauce pan
• Warm blanket


Directions:

1. Fill your jars/container with hot water and leave them until ready to use.

2. Turn the stove to a medium-low heat and slowly heat the milk until it reaches 180 F (82 C) or until you see steam coming from the surface of the milk (it takes about 8-10 minutes).

Using freeze-dry bacteria starter:
3. Stir the freeze-dry bacteria with a small amount of lukewarm milk. Set aside.

4. Let the milk cool off until it reaches 125 F (51-52 C), it takes about 15-18 minutes.

5. Pour the dry-freeze and milk mixture into the pot of warm milk and stir well. 

Using fresh yogurt starter:
3. Mix the yogurt with a small amount of lukewarm milk. Set aside.

4. Let the milk cool off until it reaches 105 F (42-44 C), it takes about 30 minutes.

5. Take a spoon of the warm milk and mix it with the yogurt milk mixture you created earlier. Repeat the process with a few more warm milk spoons (this prevents the yogurt from curdling). Pour the yogurt/starter mixture into the warm milk and mix well.

6. Empty the water from your jars/container and fill with the warm yogurt mix. Cover the jars/container with foil or lids and wrap them in a warm blanket. Incubate for 6-8 hours. The longer they incubate, the firmer and tarter the yogurt will become (I leave mine for 8 hours). Refrigerate to stop the process. 


The homemade yogurt is good for about a week.

*The larger the fat content in the milk is, the thicker the yogurt will be.

print recipe
6 Comments

TAGS: yogurt, breakfast, Homemade yogurt, Домашно кисело мляко, Vegetarian


  • Newer
  • Older

Powered by Squarespace 6